27 December 2012

Merry Christmas

Merry Christmas everyone! I hope you all had a lovely day with family and friends :) It was a very special Christmas for us because it was my baby boy's very FIRST Christmas!

I decided this year that I will make a different Christmas cake for us. I made an orange and white chocolate mud cake and

To celebrate almost 2 years of blogging I created  a Facebook page where you can get some more ideas and recipes straight from my kitchen to yours!

Please come over for a visit and LIKE us www.facebook.com/MakeEatLove


Our Family Christmas Cake

Have a Happy Festive Season!

20 November 2012

White Chocolate and Roses 30th Birthday Cake

Ask any woman what they love and they will say...chocolate! Now add some flowers to that chocolate and you have one happy woman! (take note men) hehe.. with this in mind I decided to make my lovely neighbour a 30th Birthday cake to remember.

I decided to make her a Vanilla Cake with chocolate ganache filling, vanilla buttercream icing, white chocolate sleeve around it and pretty sugarpaste roses.


I used my delicious and trusty Vanilla Cake recipe. Get recipe here (link coming soon)

The bottom tier is two layers of vanilla cake and the top tier is one layer. I filled the layers with white chocolate ganache. Get recipe here (link coming soon)

I then frosted the whole cake with vanilla buttercream icing.

I made a white chocolate sleeve that I wrapped around the two tiers and decorated with sugarpaste roses that I handmade.


I also made a number 30 out of green sugarpaste and decorated with pink flowers. I thought this was a nice touch.


 A cake pretty enough to eat!
 

05 November 2012

Mad Scientist Birthday Cake

I don't know about you, but I just love kids birthday parties! Especially if it is my son who is having a birthday and I get to organise the party and bake the cake!!

His birthday is a pretty big deal around here probably because he has been my baby for the last 7 years and his is the only kids party I get to throw. Lucky for me we have a brand new addition to the family so come next year I will be organising two kids parties!!

After months of deciding about a theme for his party he settled on a Mad Science Party. I could finally become creative!! I searched all over the net and in books for ideas for a cake and finally we came up with this Mad Scientist Cake.


Mad Scientist Birthday cake


The cake is two layers of Vanilla Cake. You can find my Vanilla Cake recipe here (link coming soon)

The Scientist's body and head is made from Rice Crispy treats. I decided to make it from Rice Crispy treats because it is much lighter than cake and because the two layers of cake at th bottom where more than enough for all the party guests.

I covered the body with icing so that the fondant would stick better. I then sculpted the head by covering it with skin coloured fondant (MMF works very well for this as it is soft and flexable). I then formed some ears a nose and hands from the skin coloured fondant (sugarpaste - because it dries quick and hard). I made a jacket from white fondant and a bow tie from red.

I made a small amount of yellow and purple fondant which I used to make small balls  to place around the cake. I also put some small red balls inbetween.

I made eyes with white sugarpaste and I used a edible ink pens for veins and pupil. I then covered the dried eyes in a layer of edible glue and let it dry. This gives it that glaze look which looks very realistic.

I made my own very strong sugarpaste that dries almost instantly and used that to make the test tube and beaker. I coloured the bottom of the test tube and beaker with some metalic edible paint. I also made some bubbles from the same sugarpaste that bubbles over the beaker and stuck them with edible glue. I then cut my son's name out and stuck that to the bubbles so that it looks like his name is coming out of the beaker! He loved that special touch. I also made some green goo that is running out of the test tube and it falls onto the cake plate in the shape of an 8!

I made some grey royal icing and I added some tylose powder into the icing to make it dry super hard and fast. I used it to pipe some hair onto our scientist and I also used it to make his moustache.

The cake is covered in bright green buttercream icing and then the same bright green fondant.

I then placed the scientist on top  of the cake and started addding all the different elements.


Name and age detail


My son was very happy with his cake and his friends were super impressed! His science party was a huge sucess and so much fun for everyone.

I cannot wait for next year's party..........


29 October 2012

Fun and Easy Halloween Cupcakes

Halloween is such a fun time and not just for the kids but for us grown ups too! My son just loves to get dressed up for Halloween and he usually plans his scary costume many months in advance. With Halloween on our doorstep here is some Fun and Easy Halloween Cupcakes you can make. They are a great treat for your trick or treaters or a nice addition at your Halloween party and the best part is that they are so easy to make.


Simple Halloween Cupcakes

1/2 cup white Sugar
1/3 cup soft Unsalted Butter
2 Eggs
1 tsp Vanilla Extract
1 cups Self Raising Flour
1/2 cup Milk

Cream the Butter and Sugar together till light and fluffy. Beat in the Eggs and stir in the Vanilla.
Add the Flour to the mixture and mix well. Stir in Milk and beat till smooth.

Spoon half of the cupcake mixture into another bowl - add pink or blue (blue in my case) food colouring to half the mixture. Spoon blue mixture into cupcake liners and then top with vanilla mixture.

Bake for 15-20 mins at 180 degrees Celsius, until a test pin comes out clean.

Makes 12 cupcakes


To Decorate

You Need:

You need a small amount of white and black fondant or sugarpaste.
Edible ink pens.
Piping bags with white, orange and red frosting.
Halloween cake confetti

Decorate:

Make small spiders out of the black fondant.
Make some eye balls from the white and black.
Frost cupcakes in different colours. Decorate as scary or fun as you can. Make some mummy cupcakes, some scary bloody eyeballs and add some fondant spiders.


Happy Halloween!


23 October 2012

Easy Halloween Witch Cake

I made this really easy, funny witch Halloween Cake a few years ago, so with Halloween just a few days away I thought I would share it.  It was one of my first tries with fondant, so it's just a proven fact that you don't have to be an expert to make  something really cool for Halloween.
 

Burried Witch Halloween Cake


The cake was a two layer chocolate cake (you can make your own from scratch or buy the box cakes). I made mine from scratch.

Ice the bottom layer with some chocolate frosting (again here you can make your own buttercream frosting or you use store brought ones) you can also use chocolate fudge or similar. Once the bottom is covered in frosting, take the top layer and crumble it onto the bottom layer. Make some large and smaller pieces. It should look like dirt! Make sure they stick to the frosting.

I then made a witches hat from some purple fondant, some arms and legs from the green fondant and hands and shoes from the yellow. I placed it on the cake so that it looks like the witch is burried alive!

I sprinkled the cake with some cocoa powder (you can also use hot choccolate powder) to make the dirt look more real. Lastly I added some candy pumpkins just for fun!

And there you have it, a Halloween Cake to die for.......


Witch Halloween Cake

30 May 2012

Quick Sangria

Sangria is very delicious and refreshing and much easier to make than you think! You can spice up any occassion with a quick but delicious Sangria but why wait for a party, when you can spice up any day of the week with my delicious Quick Sangria.

I don't really follow a recipe when making my Sangria, but I will try my best to explain how I make it.  If you feel like you need more or less of something, please feel free to add or take away. The beauty of Sangria is that you can be as creative as you like!


QUICK AND EASY SANGRIA

Half a bottle (375ml) of dry Red Wine
Two apples cut into small cubes
One pineapple cut into small cubes
Two cinnamon sticks
Five star anise
250ml Mixed Berry Juice
250ml Sprite

Cut all the fruit into small cubes (think bite size and they must look good in a glass)
Pour red wine over fruit and if you have time let it sit. Half an hour should do! If you have no time, no worries, just go to next step. You can use any red wine you like.
Pour in the Mixed Berry Juice - you can even use orange juice, but I found it "clouded" the red and I liked the pretty red look!
Add cinnamon sticks and star anise
Add Sprite * If you like less sweet add Sparkling Water or Soda Water instead
Mix well and chill for about 2 hours.

Serve and enjoy. Makes about 4-5 glasses (you might want to double up)


Quick and Easy Soft Pretzels Without Yeast

If you want a recipe for THE best and easiest Homemade Soft Pretzels without yeast, you have come to the right place. It's been exactly a year since I posted my Homemade Soft Pretzel without yeast recipe, and as a thank you to everyone who has visited my blog and tried my recipe (all 10 000 of them according to my blog stats) I wanted to post it again! It is definitely still very easy and very very yummy!

It is the easiest and tastiest Soft Homemade Pretzel you will ever make and taste, and the best part NO yeast! So no waiting around for dough to rise...


HOMEMADE SOFT PRETZEL RECIPE

2 cups (500ml) All Purpose Flour
3 tbsp Unsalted Butter
2 tbsp White Granulated Sugar
2 tsp Baking Powder
1/3 (75ml) cup Full Cream Milk
pinch of salt
Coarse Salt or Salt Flakes
1 Egg - beaten

Rub the Unsalted Butter into the Flour until it looks like crumbs. Add Sugar, Baking Powder and Salt and mix together. Add Milk slowly till all the ingredients are wet. Do not add all the milk at once. You have to make sure that the dough is not too sticky, but also not too dry. If you need more milk, you can add another drop. Once the dough is formed you do not have to let it rest, you can work with it straight away.

Divide the dough into smaller balls. Roll out each ball into a long snake. Twist them into shape (be creative) and put onto prepared baking sheet. Once you have made all your pretzels, brush them with the egg (egg wash) and sprinkle with coarse salt or salt flakes.

Bake in preheated oven 180 degrees Celsius for 10 minutes (depending on size of your pretzels) - they should be nice and golden on the top.

Serve warm or cold, they are delicious either way.

If you like this recipe please leave me a comment, I would love to hear from you.

If you want more recipes like this and some delicious ideas come over and like our Facebook Page

www.facebook.com/MakeEatLove


Enjoy!


01 March 2012

Quick and Easy Tiramisu

If you need a quick and easy dessert that will "pick up" any meal try my delicious Quick and Easy Tiramisu. It is really quick and easy to put together and everyone will think you spend hours making it! You can make it in individual portions (as I have in this one) or in a large dish. It is perfectly light and a great end to a good meal.


QUICK AND EASY TIRAMISU

100 ml Strong Espresso Coffee
75g Soft Brown Sugar
50 ml Coffee Liqueur or Brandy
200g Sponge Finger Biscuits (Lady Fingers)
400g Ready made Custard
250g Mascarpone Cheese
1 tsp Vanilla Extract
50g Plain dark chocolate finely chopped

Make your espresso. Mix coffee with half of the Brown Sugar and Coffee Liqueur or Brandy.
Toss your Sponge Fingers in the mixture. Not too long as you don't want them to be soggy!
Place Sponge Fingers into your dish.
Beat the Custard, Mascarpone, rest of Brown Sugar and Vanilla together till nice and fluffy.
Spoon over the Sponge Fingers.
If you are using a large dish you will repeat the above two steps so that there is a layer of Sponge Fingers and a layer of custard mixture, a layer of Sponge Fingers and a layer of custard mixture.
If you use individual glasses, you will only need one layer.
Top with finely chopped dark chocolate.
Chill in the fridge for about an hour before serving.

Enjoy!

29 February 2012

Noddy Car Birthday Cake

My neighbour (Mimi)'s baby recently turned 2 and she asked me to help her make him a cute Noddy cake. They are French and the little guy just loves Noddy (Noddy in French is called Oui-Oui, pronounced wee-wee). Together we decided to make him a Noddy Car with a fondant Noddy inside the Car.
He was VERY happy with his Oui-Oui!


I gave Mimi the job to bake the cake. She used a Vanilla Cake Recipe for the cake and baked it in a standard bread pan, which she let cool for a few hours. The cake needs to be completely cooled and firm before cutting and decorating.

To decorate the Car and make Noddy you will need:

Yellow Butter Icing
Yellow fondant
Blue fondant
Grey fondant
Red fondant
Light Pink (or flesh coloured) fondant
White fondant
Black fondant
Shredded Coconut
Green Edible Food Spray
Brown Royal Icing
Piping bag
Edible glue
Black edible marker pen

HOW TO MAKE A NODDY CAR

After the cake has cooled down, carve the cake into a car shape and cover it in Butter Icing. The Butter Icing helps to keep the crumbs in control and will help the fondant stick to the cake. I coloured the Butter Icing the same yellow as the fondant.

Cover the car with the yellow fondant, take care not to let the fondant tear. Make an arch for the windscreen from the yellow fondant and let it dry completely before you stick it to the front of the car with edible glue. Form wheels (with circular cutter), grill, bumper, head lights, steering wheel and interior of car out of grey fondant. Stick to car with edible glue. I then put the Birthday boy's name on the back of the car in blue fondant letters. You can also create a little licence plate if you wish ;) I also added a blue fondant 2 to the front of the car.


HOW TO MAKE NODDY FROM FONDANT

Make Noddy's head from light pink or flesh coloured fondant. Red for his mouth and white, blue and black for his eyes. Make his hat from blue fondant and put a little yellow ball on top. I added some hair with brown Royal Icing (with the piping bag)


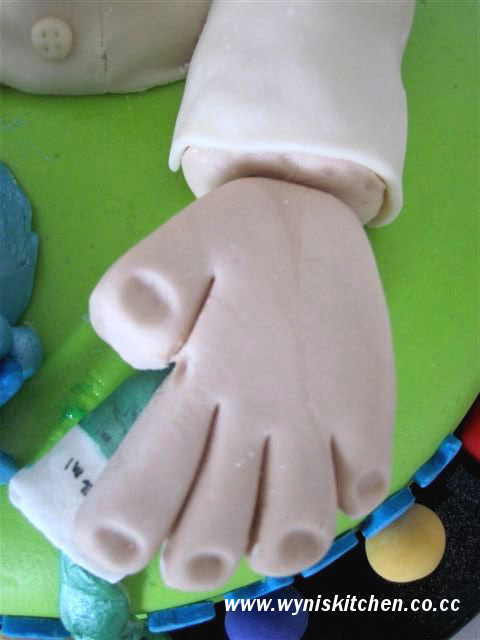
Noddy's body is made from red fondant. You only need to make his top part as he will be sitting in the car. His hands are made from the light pink or flesh coloured fondant. I made his neck tie from yellow fondant which I added red dots (fondant) to. You can use small, thin dowel sticks or even a kebab scewer to secure his body into his car.

EXTRA DETAILS

Mimi tried her hand at fondant work and made some cute mushrooms, bees and flowers. Flowers were made using a flower cutter. You will need red and white fondant for the mushrooms, yellow and white for the bees (striped made using a black edible marker) and blue, red, yellow and white for the flowers. Have fun here and be creative.

I made the grass by placing some scredded coconut into a bag and spraying it with the green edible food spray, then shaking it up untill all the coconut is covered in green. It dries instantly!
Place green grass on a tray or cake plate, put Noddy Car with your fondant Noddy inside on top of the grass and decorate with mushrooms, flowers and bees.

I also made the birthday boy's name out of red and blue fondant and placed it on the grass with the nr 2. I think the freeform letters looked really good with the other details.


HOW TO MAKE NODDY CUPCAKES

We also made and decorated a few cupcakes. I made some Noddy faces with fondant and placed them on top of the iced cupcakes that my neighbour made. I think they came out very cute!


Despite the terrible heat we had to work in (and trust me heat and fondant don't go together) and me being 8 months pregnant, we had LOADS of fun creating this cake and I think Noddy and his Car came out really well. In the excitement to finish the cake we forgot about the red wheel bumper covers, but what the heck, I still think it looked great and little Lukas loved his cake!