This year I wanted to make some special Easter Eggs for Easter. I decided to make some cute Easter Bunnies and Chickens using White Chocolate Easter Eggs and Fondant. It took me quite a while, but I had so much fun making them.
HOW TO MAKE EASTER EGG BUNNIES AND CHICKENS
You will need white bantam Easter Eggs (the white candy coated chocolate eggs). You can use the bigger ones, but I found that the smaller bantam eggs works really well.
You need fondant in alot of different colours.
You need white and green Royal Icing.
Edible Glue and Colour pens (edible ink).
Marie Biscuits as a base for your eggs.
Green edible food spray (optional)
 |
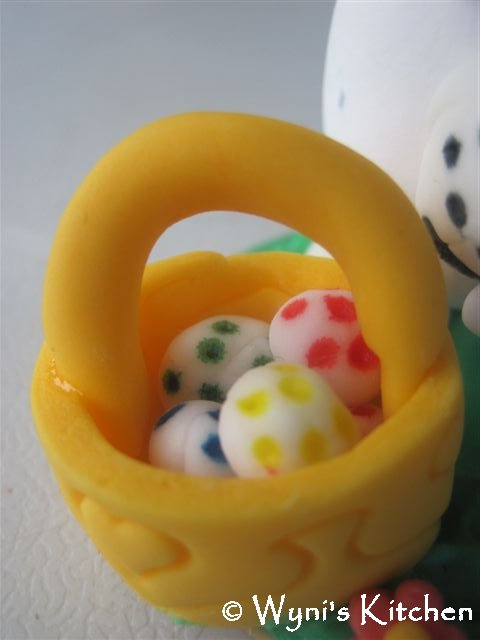
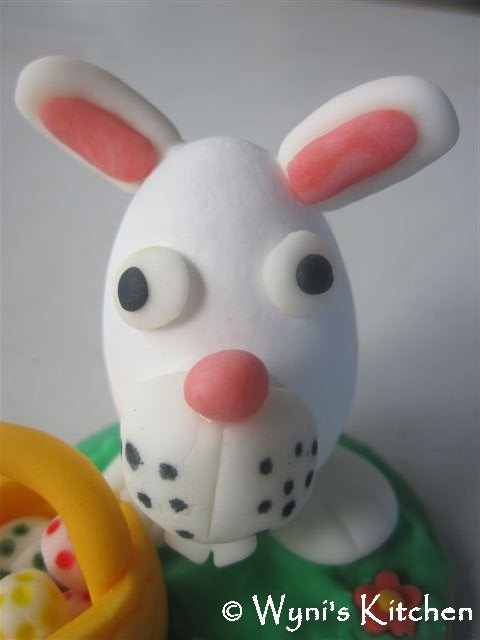
| Easter Bunny with Easter Egg basket |
For the Easter Bunny with a basket of Easter Eggs I used white fondant for his muzzle, his eyes, ears, feet and Easter Eggs.
I used a black pen to draw on his muzzle and different coloured pens to draw on the Easter Eggs.
Black fondant for his eyes.
Pink fondant for his nose and ears and little cotton tail.
I stuck his muzzle, feet and ears with some white royal icing and his eyes and nose with edible glue.
I used yellow for the basket on which I made an imprint.
Red and yellow fondant for the flowers.
The base is a Marie Biscuit covered with green royal icing.
 |
| Basket with Easter Eggs |
 |
| Easter Bunny |
 |
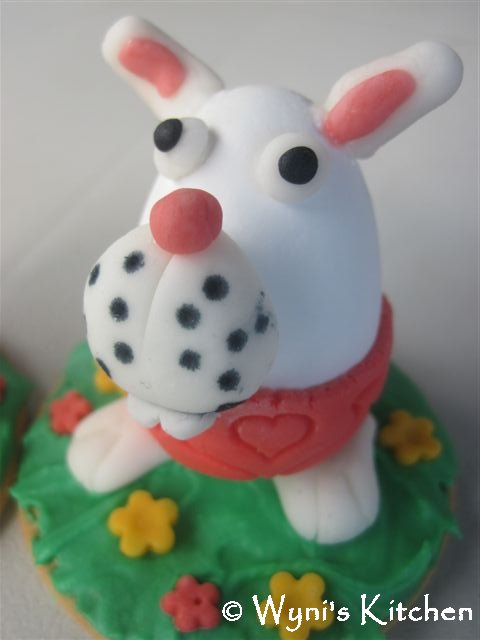
| Baby Boy Bunny |
For this adorable
Baby Boy Bunny I used white fondant for his muzzle, his eyes, ears, feet and Easter Eggs.
I used a black pen to draw on his muzzle and different green and red coloured pens to draw on the Easter Eggs.
Black fondant for his eyes.
Pink fondant for his nose and ears and little cotton tail.
Blue fondant for his outfit which I embossed with a design.
I stuck his muzzle, feet and ears with some white royal icing and his eyes, nose and outfitwith edible glue.
The base is a Marie Biscuit covered in green royal icing.

For the
Easter Chicken I used red fondant for his beak and comb. I used white and black fondant for his eyes. I used white fondant for his eggs. I used the coloured pens to draw some dots on the eggs.Yellow fondant for his wings, feet and little heart. The base is a Marie Biscuit covered with white royal icing which I sprayed with green food spray. (you can also just use green royal icing)
 |
| Chicken Licken |

For this cute
Litte Girl Bunny I used white fondant for her muzzle, her eyes, ears and feet.
I used a black pen to draw on her muzzle.
Black fondant for her eyes.
Pink fondant for her nose and ears and little cotton tail. Pink fondant for her little outfit which I embossed with a design.
I stuck her muzzle, feet and ears with some white royal icing and her eyes, nose and outfitwith edible glue.
I used yellow and pink fondant for the flowers.
The base is a Marie Biscuit covered in green royal icing.
 |
| Baby Girl Bunnies |

For this
Little Cottontail I used white fondant for his muzzle, his eyes, ears and feet.
I used a black pen to draw on his muzzle.
Black fondant for hir eyes.
Pink fondant for his nose and ears and little cotton tail.
I used blue and yellow fondant for the flowers.
The base is a Marie Biscuit that is covered with green royal icing. I also piped some green grass with the royal icing.
For the cute
Bunny with large Easter Egg I used white fondant for his head and body, his eyes, ears and feet. I used a black pen to draw on his muzzle.
Black fondant for his eyes.
Pink fondant for his nose, ears, teeth and little cotton tail.
Yellow fondant for his outfit which I embossed with a design and for his bow and flowers on the egg.
Blue fondant for the flowers on the egg.
Red and yellow fondant for the flowers on the grass.
I stuck his muzzle, feet and ears with some white royal icing and his eyes, nose and outfit with edible glue.
The base is a Marie Biscuit covered in green royal icing and I also piped some green grass with royal icing.
Happy Easter and happy creating!


