20 June 2013

Monster Smash Cake - First Birthday

I shared my Baby Boy's First Monster Birthday Cake with you so I thought I would show you how his Monster Smash Cake looked like.


It was plain Vanilla Cake. The recipe is all over my blog. I covered it with blue vanilla Buttercream icing. I did not bother to make it extra healthy because it is a smash cake after all and he hardly got any in his mouth! He was actually pretty good with it :) I would have liked to see a lot more MESS!!


Here is my Little Monster with his Monster Smash Cake! Isn't he just THE cutest!!


First Birthday Book Cake - Monster Cake

I wanted to share with you the cute Monster Cake I made for my baby boy's First Birthday! I decided on a Monster Theme for his First Birthday Party and had to come up with a cake that fits into the Monster theme, but also something that suits him and his personality.

I just love my baby boy he is such an adorable little Monster. The cute fluffy kind of course! He is such a bundle of energy and it is hard to keep up with him sometimes, but when he keeps still for a few minutes he loves his cuddles and hugs. He is just a loving, happy, laughing bundle of joy!
He loves books and he is very intelligent. Keeping all of this in mind, I came up with a great idea for his cake.


I decided to make an Open Book Monster Cake but with a little story in it. The story of his First Birthday. The story is about a little Monster's First Birthday and this little cheeky Monster who tried to steel the Birthday cake! Well there is more, there is another little Monster hiding inside the cake and he is also trying to get his hands on the cake!
I also added some other fun little elements. I made his name into six different little Monsters, a different Monster for each letter. All the kids at the party loved that!


I also added an extra surprise to the cake...

Once the cake was cut everyone saw the surprise...pictures inside the cake. Every slice had the same pictures. I just loved adding pictures inside my cake. I learned How to add pictures inside my cakes from a tutorial I bought. I added stars and half moons!


I loved making his cake because it was totally mine. My design, my ideas and my creativity. I did not have to search the net for hours for ideas, I  did not have to make something that has been made a million times before, I just used all the ideas I had in my head and made it my own. My baby loved his cake and so did everyone at his party. What a special, precious day it was!


It was a Happy First Birthday with my little Monster!


08 April 2013

Under the Sea or Little Mermaid Cake

As promised here is my Under the Sea cake with fondant Mermaid cake topper. I made this cake for a little girl who turned 5 and although the cake was a challenge in the February heat I think it came out really well.


Unfortunately I did not take photos with every step that I did, but I will try and tell you how I made all the different fondant/sugarpaste figurines on the cake. It was alot of fun to make the Mermaid and all the little sea creatures. I made a turtle, octopus, fish, coral, sea anemone, shells, starfish, sea sponges, seaweed and more.


Little Mermaid cake topper


How to make a fondant or sugarpaste Mermaid Cake Topper

You will need:


Fondant or sugarpaste
Gel colours in flesh, brown, green, black or  pre-coloured fondant
Edible spray (green)
Lollipop sticks
Edible glue
Tools


I used sugarpaste just because it dries harder than fondant and we have very high humidity here. I also wanted it to be hard because it was so big and the main part of the cake. You can use fondant and add a bit of tylose powder or CMC powder to it to make it dry harder.

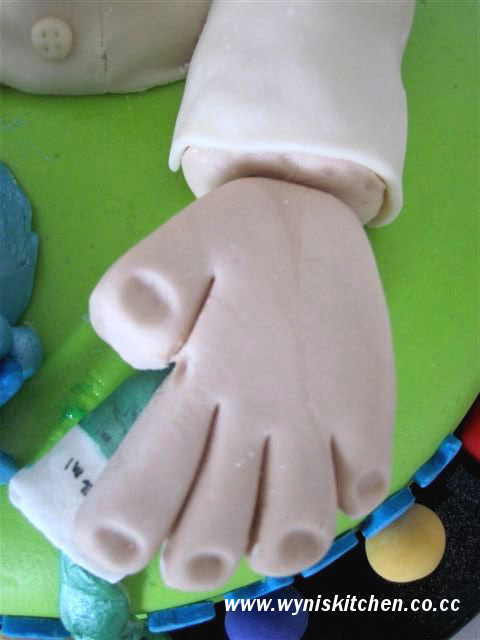
Form the body for the Mermaid first from the flesh coloured fondant. Put a lollipop stick inside the body so that only a small part comes out both ends, to attach head and tail. Make some arms. Attach to body with edible glue.

Make the Mermaid's head, form eyes and nose and attach head to the body with edible glue. Make sure you stick the top of the lollipop stick inside her head. Leave to dry.

Take a piece of white fondant to form the tail. I used the back of a piping tip to make the scales. I also made a small hole in the bottom where I attached the fin. Use a lollipop stick for it.

Once the tail is dry spray it with edible spray.

Cut a fin out of green fondant for the bottom of the tail. Let dry in the position that you want it to be. Once dry attach it to the Mermaid with edible glue. I left this part till I placed it on the cake!

Roll two balls from the green fondant for her top. I used the scallop tool to imprint on these balls. Stick to Mermaid with edible glue before they are dry. I made a little seastar from the green to put on her head.

Roll the brown fondant out into long thin strips an attach to Mermaid's head, you can make the hair as long or short as you want.

Little Mermaid made from fondant


How to make a fondant Sea Turtle


Fondant Sea turtle

You will need:

Sugarpaste or fondant
Gel colours in brown, green or precoloured fondant
Circular mold for shell
Tools
Edible glue


I used a silicone chocolate mould for the shell. Take a piece of brown fondant and place in mould. Remove when dry. Form head, arms and flippers from green fondant. Let dry and then attach to shell.

How to make a Fondant Octopus

Fondant Octopus

You will need:

Sugarpaste or fondant
Gel colours in purple and black or precoloured fondant
Tools
Edible glue


Make a ball for head, add eyes and form mouth with tool. To make the tentacles roll fondant into thin strips and twist. Add details. Attach to body with edible glue.


How to make fondant seaweed, seasponge, starfish and sea anemones


You will need:

Sugarpaste or fondant
Gel colours in any colour you want or precoloured fondant
Tools
Edible glue

For the sea anemone I used orange fondant and rolled it into thin strips. Put a little hole on the top and attach a few together. I added sugar pearls on the top for extra "bling".

To make the starfish I used a star cutter and cut one "leg" off and formed the rest with my hands to look more natural. I used the a piping tip to make the pattern on the starfish.

To make the seasponge roll out a piece of fondant and cut into squares. I made random hole in it with the back of a piping tip.

To make the seaweed I took green fondant and cut it into small strips. I then cut a point at the top of the strip and curled it a bit so it looks more realistic and then dried it.


Fondant seashells and seaweed


How to make fondant Seashells


Fondant sea urchins


You will need:
 
Sugarpaste or fondant
Gel colours in any colour you prefer or precoloured fondant
Tools
Moulds
Edible glue

I made the sea urchins and the seashells with moulds that I made. I made my own moulds with a special mould material and real seashells and sea urchins that I picked up from the beach.
When you make your moulds you must make sure the seashells and urchin shells have been thoroughly cleaned and washed.

I might do a post on how to make your own mould sometime. Let me know if you are interested in a tutorial and I will do one. Leave me a comment.

That is how I made my cake and all the fondant/sugarpaste figurines. Easy...right

Happy creating!

Little Mermaid Cake


How to make pretty Flower Cupcakes using Candy Corn

I made these pretty flower cupcakes for Easter and I got alot of interest in them. Everyone wanted to know how I got the effect with the petals...well it was pretty easy to do and it did not take long at all.


The big secret...I used Candy Corn for the flower petals!
Now if you are not in the USA then you might not know Candy Corn, but it is a very popular American candy. I got mine send over from the USA. You can get the normal Candy Corn (white, orange and yellow) that is so popular during Halloween, but I used the Easter edition because I just loved the pastel colours.

Here are the two different types. There might be more, but I only know about these. See how pretty the Easter Corn are!


I started off baking some Vanilla Cupcakes.
 

Vanilla Cupcakes

1 cup (250g) white Sugar
1/2 cup (115g)softened Butter
2 Eggs
2 tbsp Vanilla Extract
1 1/2 (375g) cups Self Raising Flour
1/2 cup (250ml) Milk

Cream the Butter and Sugar together till light and fluffy. Beat in the Eggs and stir in the Vanilla. Add the Flour to the mixture and mix well. Stir in Milk and beat till smooth.
 
Prepare muffin tin with cupcake liners and pour mixture evenly into cupcake liners.

Bake for 20-25 mins at 180 degrees CELCIUS.
 

Decorate your cupcakes to look like flowers

Once your cupcakes are completely cooled down, decorate with a swirl of vanilla buttercream.
 
Now comes the fun part. Take your Candy Corn and place onto the buttercream frosting with the white part facing the middle. The coloured part should face out. Just repeat it all around till it makes a flower. You can make different colour petals or just one colour - be as creative as you like!
 
The middle of the flower I decorated with some edible glitter and some coloured sugar pearls or dragees.


There you go, a perfect pretty flower for any occassion!

Enjoy and Happy Spring to the other side of the world ;)


01 April 2013

How to dry Fondant or Sugarpaste figures and toppers faster!

I recently got the opportunity to make an Under the Sea cake for a little girl who turned 5.
I knew it was going to be a challenge to make but who am I to say no to a challenge? It was February and it is stinking hot on the island in February. We call it suicide month!
All I could think of was that I would have to make a ton of fondant and gumpaste toppers and how on earth will they all dry in this heat and humidity!

I had a week to make the Mermaid topper and all the other gumpaste decorations. Luckilly they all hardened in time and I found a great trick on how to dry them faster! It worked!! What is my tip I hear you ask? It is simple really...


How to dry Fondant or Sugarpaste figures or topper faster?

Use a hair dryer! Yes I know it sounds a bit strange, but it really works. Put the hair dryer on the lowest heat setting. Hold it about (30cm) 12 inches away from the figurine that you are drying and moving the hair dryer side to side over the figure. I do it for 3 minutes and then let it rest for 3 minutes, I do it about 3 times and it will dry nicely!


If you like this tip and want to get more tips and ideas please join our Facebook page
MakeEatLove


Click here for more tips to DRY FONDANT QUICKLY


Here is the finished cake, I think it turned out pretty well. What do you think?


I will do another post on How to make a fondant Mermaid topper and other sea creatures.

Till then make, eat and love what you do!


Taddy Teddy Cupcakes

I made these cute Rock Star Taddy Teddy cupcakes for a friend who is expecting a baby.
Who does not love a Taddy Teddy? They are absolutely adorable and the light grey and blue colours are definitely my favourite colours at the moment. Just think how cute a whole baby shower would  be in the Taddy Teddy theme!

I think they came out better than expected and mommy to be loved them too!


They are so easy to make. You will  need the following:

Cupcakes (recipe to follow)
Vanilla butter icing
White sugarpaste or fondant
Grey sugarpaste
Baby blue or sky blue sugarpaste
Black sugarpaste
Black edible marker
Edible glue

Chocolate Cupcakes

1 cup (250g) Sugar
1/2 cup (115g) Salted butter
2 Eggs (large)
5 tbsp (50g) Cocoa powder
1.5 cups (190g) Self Raising Flour
1/2 cup (120ml) Milk

Cream eggs and sugar together till light and fluffy. This is better achieved by using an electric mixer. Beat in eggs one by one. Add flour and cocoa powder to the mixture.
Mix well. Add milk and mix till smooth.

Line muffin pan with cupcake papers. Fill cupcake papers till 3/4 full. Bake in preheated oven of 180 degrees CELCIUS for 20-25 mins. Test with a test pin, done when pin comes out clean.

Decorating

Decorate cooled cupcakes with a swirl of vanilla buttercream icing. Use piping bag and any big  tip you like. I used a star tip.

Buttercream Icing

1/2 cup (115g) Unsalted butter (softened)
2 cups (500g) Icing sugar
Vanilla extract of pod
Drop of milk

Cream butter and icing sugar together. Add vanilla. Add a drop of milk to give you the right consistency. You be the judge here, add more milk if needed or less. It needs to be firm - for piping

Sugarpaste decorations

How to make a Fondant or Sugarpaste Taddy Teddy


You will need grey, white, back and blue sugarpaste. You can use fondant, but I used sugarpaste because it dries harder. The humidity here is extremely high this time of  the year and I dont want to take a chance.

Form the teddy from the grey, work fast as sugarpaste dries as you use it! Make a little ball for his body and a smaller ball for his head. Roll out some arms and legs. Attach all with edible glue and add a nose, ears and eyes. Add some final touches like his "Me to You" patch on his foot and some detail. I made him a little guitar from the blue sugarpaste. He is sitting on top of a white star, I made it by using a star cookie cutter. Let it dry completely before you stick your taddy teddy on it (with edible glue).


I just had fun with the rest of the decoations. I did the baby's initials with silver dragees on blue stars. I made another little baby Taddy Teddy. I added a dummy (pacifier) and some lettering.
The sky is the limit, here you can personalise it as you like.


07 March 2013

Why so quiet?

I can't believe we are already in the second week of March 2013 and I have not even posted anything this year? I blame it on Facebook! Yes we are allowed to blame Facebook for taking our time, time that would be better off spent somewhere else. Don't get me wrong I like Facebook, it is quick and convenient and you can interact with people on a closer level but I have missed my blog and blogging friends.

I have been quite busy this year and have alot to post. I better get on with it. I hope you enjoy it.

If you do want to follow us on Facebook, here is the link: www.fb.com/MakeEatLove


See you soon!

27 December 2012

Merry Christmas

Merry Christmas everyone! I hope you all had a lovely day with family and friends :) It was a very special Christmas for us because it was my baby boy's very FIRST Christmas!

I decided this year that I will make a different Christmas cake for us. I made an orange and white chocolate mud cake and

To celebrate almost 2 years of blogging I created  a Facebook page where you can get some more ideas and recipes straight from my kitchen to yours!

Please come over for a visit and LIKE us www.facebook.com/MakeEatLove


Our Family Christmas Cake

Have a Happy Festive Season!

20 November 2012

White Chocolate and Roses 30th Birthday Cake

Ask any woman what they love and they will say...chocolate! Now add some flowers to that chocolate and you have one happy woman! (take note men) hehe.. with this in mind I decided to make my lovely neighbour a 30th Birthday cake to remember.

I decided to make her a Vanilla Cake with chocolate ganache filling, vanilla buttercream icing, white chocolate sleeve around it and pretty sugarpaste roses.


I used my delicious and trusty Vanilla Cake recipe. Get recipe here (link coming soon)

The bottom tier is two layers of vanilla cake and the top tier is one layer. I filled the layers with white chocolate ganache. Get recipe here (link coming soon)

I then frosted the whole cake with vanilla buttercream icing.

I made a white chocolate sleeve that I wrapped around the two tiers and decorated with sugarpaste roses that I handmade.


I also made a number 30 out of green sugarpaste and decorated with pink flowers. I thought this was a nice touch.


 A cake pretty enough to eat!
 

05 November 2012

Mad Scientist Birthday Cake

I don't know about you, but I just love kids birthday parties! Especially if it is my son who is having a birthday and I get to organise the party and bake the cake!!

His birthday is a pretty big deal around here probably because he has been my baby for the last 7 years and his is the only kids party I get to throw. Lucky for me we have a brand new addition to the family so come next year I will be organising two kids parties!!

After months of deciding about a theme for his party he settled on a Mad Science Party. I could finally become creative!! I searched all over the net and in books for ideas for a cake and finally we came up with this Mad Scientist Cake.


Mad Scientist Birthday cake


The cake is two layers of Vanilla Cake. You can find my Vanilla Cake recipe here (link coming soon)

The Scientist's body and head is made from Rice Crispy treats. I decided to make it from Rice Crispy treats because it is much lighter than cake and because the two layers of cake at th bottom where more than enough for all the party guests.

I covered the body with icing so that the fondant would stick better. I then sculpted the head by covering it with skin coloured fondant (MMF works very well for this as it is soft and flexable). I then formed some ears a nose and hands from the skin coloured fondant (sugarpaste - because it dries quick and hard). I made a jacket from white fondant and a bow tie from red.

I made a small amount of yellow and purple fondant which I used to make small balls  to place around the cake. I also put some small red balls inbetween.

I made eyes with white sugarpaste and I used a edible ink pens for veins and pupil. I then covered the dried eyes in a layer of edible glue and let it dry. This gives it that glaze look which looks very realistic.

I made my own very strong sugarpaste that dries almost instantly and used that to make the test tube and beaker. I coloured the bottom of the test tube and beaker with some metalic edible paint. I also made some bubbles from the same sugarpaste that bubbles over the beaker and stuck them with edible glue. I then cut my son's name out and stuck that to the bubbles so that it looks like his name is coming out of the beaker! He loved that special touch. I also made some green goo that is running out of the test tube and it falls onto the cake plate in the shape of an 8!

I made some grey royal icing and I added some tylose powder into the icing to make it dry super hard and fast. I used it to pipe some hair onto our scientist and I also used it to make his moustache.

The cake is covered in bright green buttercream icing and then the same bright green fondant.

I then placed the scientist on top  of the cake and started addding all the different elements.


Name and age detail


My son was very happy with his cake and his friends were super impressed! His science party was a huge sucess and so much fun for everyone.

I cannot wait for next year's party..........